How to Run Your Own Cloud Server at Home: Complete 2024 Guide
If you’re feeling the pinch of constantly increasing subscription fees for Google Drive, Dropbox, or iCloud, you certainly aren’t alone. Learning how to run your own cloud server at home is the ultimate step toward achieving true data sovereignty. By taking the leap and hosting your digital life locally, you instantly reclaim total control over your privacy, tighten your security, and completely eliminate those frustrating storage limits.
It’s not just hardcore tech enthusiasts making the switch, either. Remote workers, freelancers, and privacy advocates are steadily moving away from public infrastructure. When you rely entirely on third-party cloud platforms, you leave yourself vulnerable to unexpected data loss, sudden account suspensions, and inevitable price hikes. Building a self-hosted server changes the dynamic entirely: you own the physical hardware, and more importantly, you own your data.
If you’re ready to break free from these limitations, this guide will walk you through exactly how to run your own cloud server at home. Whether you want a simple, plug-and-play network-attached storage (NAS) device or you’re eager to build an advanced containerized lab, we’ll cover practical solutions tailored to every technical comfort level.
Why the Need for Learning How to Run Your Own Cloud Server at Home Happens
The main issue with public cloud providers lies in their underlying business models. Whenever a major tech company decides to bump up their monthly fees or unilaterally rewrite their terms of service, everyday users generally have no choice but to nod and comply. This lack of control fosters a dangerous dependency on services that prioritize profit over user experience.
Beyond the financial aspect, data privacy has emerged as a massive concern. It is an open secret that big tech platforms frequently scan your uploaded files, personal photos, and sensitive documents to train advertising algorithms or monitor compliance. Moving to a private cloud storage environment acts as a shield, guaranteeing that your personal files stay strictly confidential and well out of reach from corporate web scrapers.
There is also a physical bottleneck to consider: internet bandwidth. Have you ever tried to pull massive 4K video files or download full system backups from a remote server? If so, you know that you are entirely at the mercy of your ISP’s download and upload caps. A local home lab bypasses this problem entirely, allowing for blazing-fast gigabit—or even 10-gigabit—transfers across your house, which drastically outperforms any remote server.
Quick Fixes / Basic Solutions
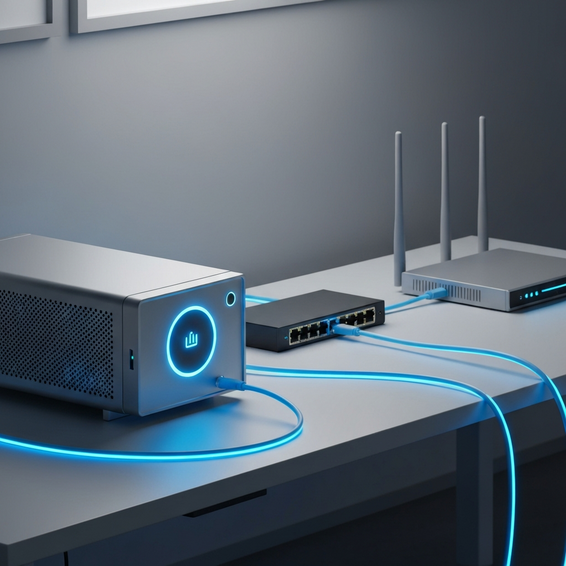
You don’t need a computer science degree or thousands of dollars in enterprise-grade hardware to escape recurring subscription fees. If you want to start small, basic consumer setups offer an incredibly straightforward path to personal cloud architecture.
- Buy a Pre-built NAS: Trusted brands like Synology, QNAP, and Asustor manufacture fantastic plug-and-play solutions. The process is incredibly simple: plug the unit into your home router, slot in some standard SATA hard drives, and use their polished web interfaces to seamlessly sync files across all your devices.
- Use a Raspberry Pi: If you are working with a tight budget, try connecting an external USB hard drive to a Raspberry Pi 4 or 5. By installing a lightweight Linux distribution alongside NextcloudPi, you can create a robust self-hosted server that sips electricity while offering surprisingly rich features.
- Repurpose an Old Laptop: Don’t throw away that aging laptop gathering dust in your closet. Install a highly stable Linux OS, like Ubuntu Server or Debian, and use it as a home server. Because laptops have built-in batteries, they naturally act as a free Uninterruptible Power Supply (UPS) during power outages. From there, you can easily share folders across your local network using Samba (SMB).
These introductory setups provide an excellent foundation for private cloud storage without requiring endless hours of configuration. They are the perfect launching pad for beginners who want to test the waters of home networking before eventually committing to a more complex build.
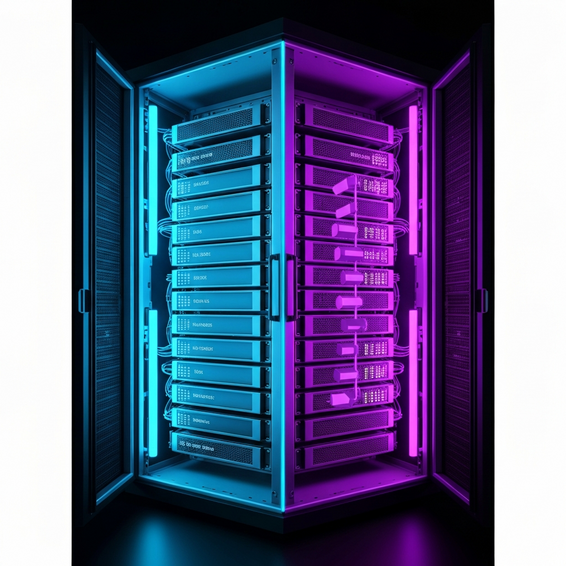
Advanced Solutions for IT Professionals
For DevOps engineers, developers, and passionate homelabbers, off-the-shelf NAS devices can sometimes feel a bit too restrictive. Transitioning to a dedicated bare-metal server unlocks raw computational power, grants you full root access, and offers the ultimate flexibility to shape your infrastructure exactly how you see fit.
- Proxmox VE Virtualization: Installing the Proxmox hypervisor on a custom PC or dedicated server rack opens up a world of possibilities. This powerful, free environment lets you spin up multiple virtual machines (VMs) alongside lightweight Linux containers (LXCs), ensuring your individual cloud services are strictly isolated from one another.
- Docker and Containerization: Instead of cluttering your host operating system with various application packages, deploy everything as Docker containers. You can orchestrate Nextcloud, ownCloud, or Seafile entirely through a single
docker-compose.ymlfile. If you want to dive deeper into mastering this methodology, be sure to read our complete Docker Compose guide. - TrueNAS Core and Scale: For enterprise-grade file storage that prioritizes data integrity, TrueNAS is the industry standard—especially when paired with hardware utilizing ECC (Error-Correcting Code) RAM. Because TrueNAS leverages the brilliant ZFS file system, your drives are inherently protected against silent data corruption and can generate instant, automatic snapshot backups.
While these advanced approaches do require intermediate command-line skills and a solid grasp of network configuration, the payoff is tremendous. They deliver maximum security, peak performance, and near-limitless scalability for your most critical data.
Best Practices for Server Maintenance
Taking ownership of your infrastructure means you also take ownership of its maintenance. When you host your own cloud, you are the entire IT support team. If a drive fails or a network vulnerability is exposed, it’s on you to fix it, which makes optimization and security an absolute necessity.
First and foremost, you must stick to the 3-2-1 backup rule. Keep three total copies of your data, store them across two different media types, and ensure at least one encrypted copy lives safely off-site. Your home cloud should never be your single point of failure. Consider setting up a scheduled sync of your most vital encrypted files to a highly affordable cold-storage provider, such as AWS S3 Glacier or Backblaze B2.
Next, lock down your local network to thwart unauthorized access. You should never expose internal ports—like port 80 or 443—directly to the public internet unless they are securely routed through a reverse proxy. Utilizing tools like Nginx Proxy Manager, Caddy, or Traefik adds a critical layer of security and granular traffic control.
Additionally, automate your SSL certificates through Let’s Encrypt to guarantee your web connections remain encrypted at all times. It’s also wise to deploy intrusion detection software, such as Fail2Ban or CrowdSec, which will automatically block malicious IP addresses that try to brute-force their way into your login pages. For a more comprehensive look at hardening your server, check out our article on Linux security basics.
Recommended Tools and Resources
Building your own system doesn’t mean you have to reinvent the wheel. To make your self-hosting journey smoother and significantly more reliable, here are the industry-standard software and hardware platforms you should explore:
- Nextcloud: Widely considered the gold standard for self-hosting, this software is a complete Google Drive alternative featuring automatic photo syncing, calendar management, and native document editing.
- Tailscale: A truly brilliant, zero-configuration mesh VPN. It allows you to securely access your home cloud from a coffee shop halfway across the world without ever needing to manually open dangerous ports on your router.
- Cloudflare Tunnels: Another exceptional tool designed to expose your local web applications to the outside world safely, all while keeping your actual home IP address completely hidden from attackers.
- Hardware Options: If you are actively shopping for server hardware, consider picking up a Raspberry Pi 4 for incredibly low-power micro setups, or invest in an Intel NUC Mini PC if you need a punchy, capable virtualization host.
Leaning on the right foundational tools will dramatically cut down on the daily friction of server management and help you maintain the high system uptime you need.
FAQ Section
Is it safe to run a personal cloud server?
Absolutely—provided you configure it with security in mind. By utilizing automated SSL-encrypted connections, enforcing strong and unique passwords, and funneling remote access through a modern VPN tunnel like Tailscale, your localized data is often vastly more secure than it would be sitting on a massively targeted public platform.
What happens if a hard drive fails?
Because all hard drives have a finite lifespan and will eventually fail, intermediate setups rely on RAID (Redundant Array of Independent Disks) or ZFS storage pools. These technologies essentially mirror your files across multiple separate drives. If one drive dies, your cloud server just keeps running smoothly, allowing you to swap out the broken drive without losing a single kilobyte of data.
Do I need a fast internet connection?
If you primarily access your files while sitting at home connected to your own Wi-Fi, your ISP’s internet speed is totally irrelevant. However, if you plan to stream your media library or pull down large work files while traveling, having a solid upload speed from your home Internet Service Provider is highly recommended to prevent lag.
How much does it cost to build a home cloud?
The beauty of this project is its pricing flexibility. Your upfront hardware costs can be exactly $0 if you decide to repurpose an old laptop, or scale up to $500+ if you want a robust, multi-bay TrueNAS system. Once you own the hardware, your only ongoing expense is a tiny bump in your monthly electricity bill—which easily beats paying a premium for a yearly cloud subscription.
Conclusion
Figuring out how to run your own cloud server at home is one of the most rewarding technical projects you can undertake. It finally frees you from the endless, exhausting cycle of monthly subscription models and ensures your personal data rests securely in the palms of your own hands.
Whether you opt for the simplicity of a pre-built NAS device running Nextcloud or you decide to roll up your sleeves and architect a robust Proxmox environment, the sheer empowerment of data sovereignty is unmatched. Our advice? Start small. Repurpose an old laptop today, lock down your network basics, and gradually scale up your home lab as you gain confidence.
Why not take action this weekend? Download CasaOS or Nextcloud, install it on a spare machine, and see for yourself. Once you experience the blazing local network speeds and the peace of mind that comes with true privacy, you’ll seriously wonder why you ever relied on massive public cloud providers in the first place.